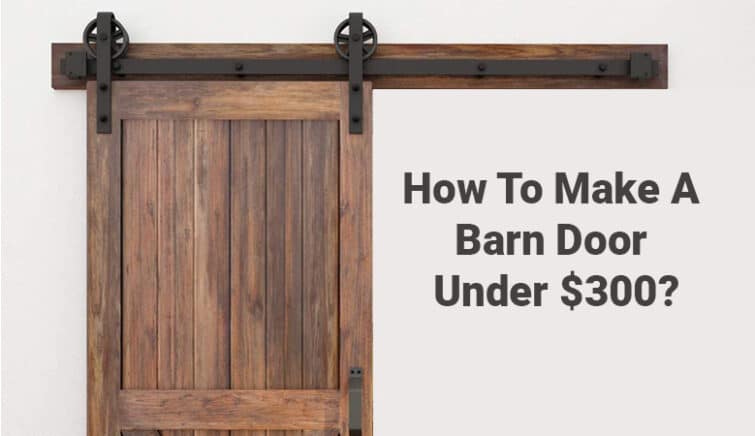
Introduction
If you’re looking to add a rustic touch or space-saving solution to your home, learning how to make a barn door is one of the best DIY projects you can tackle. Sliding barn doors aren’t just trendy—they’re functional, affordable, and surprisingly simple to build with the right tools and materials. In this detailed guide, you’ll learn how to build a barn door from scratch, perfect for beginners and experienced DIYers alike. Whether it’s for a bedroom, pantry, bathroom, or closet, this tutorial covers everything you need to know to create a custom barn door on a budget.
Why Choose a Sliding Barn Door?
Sliding barn doors are becoming increasingly popular in home design, especially for those seeking a space-saving, stylish, and functional solution. If you’re working with a small or compact room where a traditional swinging door takes up too much space, a sliding barn door is a smart and attractive alternative. These doors slide smoothly along a track instead of swinging open, making them ideal for tight spaces like small bedrooms, laundry rooms, bathrooms, closets, and pantries.
One of the biggest benefits of sliding barn doors is their versatility—they’re available in a variety of materials, finishes, and designs, and you can easily customize them with different stains or paints to match your home décor. Whether you want to create a rustic farmhouse look or a sleek, industrial modern vibe, barn doors can enhance your interior style with character and charm.
Many homeowners also love that barn doors add a unique focal point to any room. They’re not just functional; they’re decorative and can boost the overall value and aesthetic appeal of your home. Plus, installation is relatively simple, making them a popular choice for DIY home improvement projects.
Key benefits of sliding barn doors include:
-
Maximizing usable floor space in small areas
-
Easy customization for any interior design theme
-
Adding rustic or industrial flair to your home
-
Practical use in bedrooms, bathrooms, laundry areas, and closets
Whether you’re remodeling a small home, looking for modern farmhouse door ideas, or just searching for the best sliding door for limited spaces, sliding barn doors offer a perfect balance of function and style.
For more inspiration on enhancing your home’s interior, consider our article on ceiling design ideas to complement your new barn door.
Materials and Tools Needed to Build a Barn Door
Before starting, gather all your materials. Make sure everything is prepped and accessible.
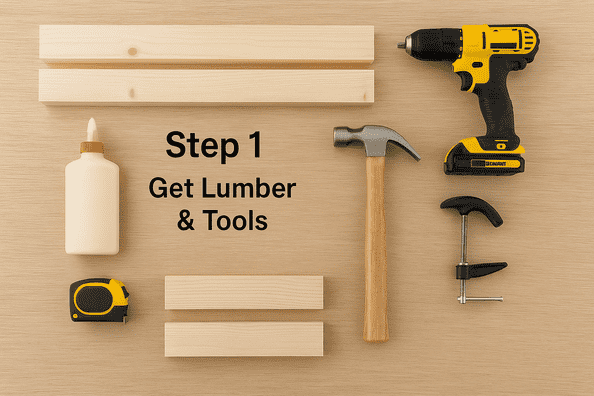
Lumber Needed:
- 1×6 boards for the door frame (usually 12–14 boards)
- 1×4 boards for vertical and diagonal trim
- 1×2 board (optional, for support moulding)
Tools Required:
- Tape measure
- Miter saw or circular saw
- Power drill
- Nail gun or hammer
- Clamps
- Wood glue
- Sandpaper (80 to 220 grit)
- Paintbrushes or rollers
- Safety gear (gloves, goggles, mask)
Optional Tools:
-
- Wood filler (for gaps)
- Angle grinder with brush cup (for distressed finish)
- Router (for professional edge work)
Tip: Choose straight, non-warped boards. Pine and MDF are budget-friendly, but solid wood like cedar or oak adds premium quality.
So without wasting time, let’s check out how to make sliding barn doors and save your home space.
To further enhance your home’s exterior, explore our cheap fence ideas for affordable and stylish options.
Step-by-Step Instructions: How to Make a Sliding Barn Door
1. Choose the Hardware
Selecting the right hardware is key to functionality and design. Here’s what you’ll need:
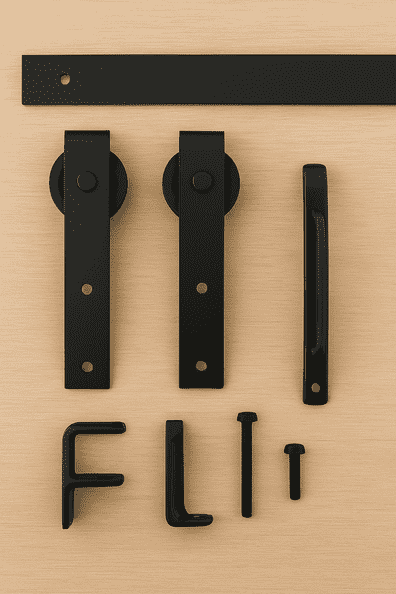
Barn Door Hardware Kit (usually includes):
- Sliding door track
- Hangers/rollers
- Door stoppers
- Floor guide
- Screws and anchors
Optional Add-ons:
- Decorative handles or pulls
- Soft-close attachments
- Privacy lock set
For a cohesive look throughout your home, consider matching your barn door hardware with your cabinet door styles.
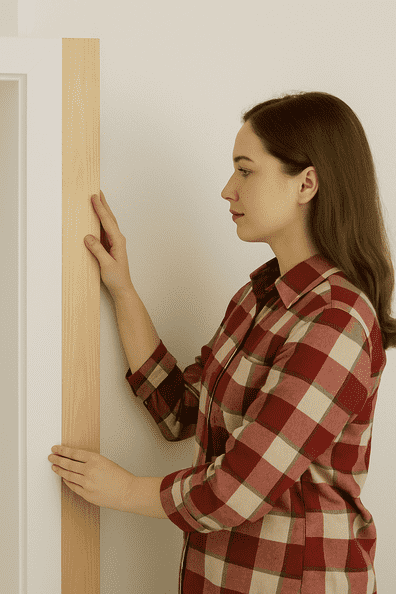
2. Remove the Door and Measure the Opening
Before you begin installing a DIY sliding barn door, it’s important to remove the old door and get precise measurements. Follow these steps to make sure your custom barn door fits perfectly:
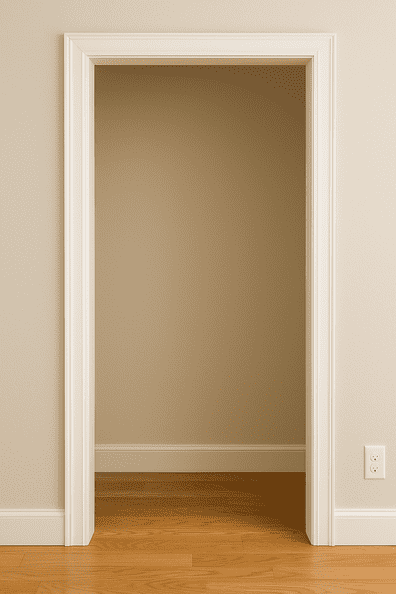
Step 1: Remove the Existing Door and Hardware
-
Carefully take off any existing door, including the hinges, trim, and all hardware.
-
This clears the doorway and gives you a clean surface to work with.
Step 2: Measure the Door Opening Width
-
Use a measuring tape to measure the width of the opening.
-
Then, add 2 inches to each side.
-
This ensures your sliding barn door covers the entire frame when closed, providing full privacy and a snug fit.
Example:
If your opening is 30 inches wide, make your barn door 34 inches wide.
Step 3: Measure the Height of the Opening
-
Measure from the floor to the top of the door opening.
-
Add 1 inch above the opening for clearance and hardware installation.
Tip: This space allows room for the barn door track system and keeps the door from dragging on the floor.
Step 4: Check for Wall Clearance
-
Make sure you have enough empty wall space to the side of the opening.
-
The wall must be wide enough for the barn door to slide completely open without hitting furniture, switches, or décor.
-
This is especially important when installing barn doors in small bedrooms, bathrooms, or laundry areas.
Step 5: Double-Check Your Measurements
-
Recheck both width and height to ensure accuracy before cutting wood or ordering your door.
-
Precision is key to a smooth installation and a professional-looking result.
If you’re considering a barn door for your bathroom, our guide on bathroom door options can help you choose the best style for privacy and functionality.
3. Cut the Boards to Size (Accurate DIY Barn Door Board Cutting Guide)
Once you’ve completed your barn door measurements, it’s time to cut the boards to the exact size needed for your custom DIY sliding barn door. Getting the board sizes right is essential to make sure the door fits your space and looks professional. Follow these steps for precise and smooth results.
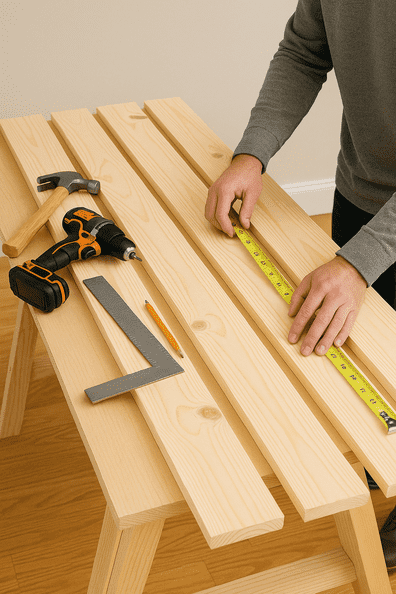
Step 1: Choose Your Boards
-
Select quality wood boards—1×6 boards are a popular choice for barn door panels.
-
Ensure the boards are straight, smooth, and free of major defects like warping or cracks.
Step 2: Measure and Cut the Width
-
Arrange the 1×6 boards side-by-side on a flat surface until they match the total door width you previously measured.
-
Trim enough boards so that the combined width equals or slightly exceeds your desired barn door size.
-
A typical 36-inch-wide barn door will require about six 1×6 boards (each around 5.5 inches wide).
Step 3: Cut the Boards to the Correct Height
-
Determine the final door height using your earlier measurements (opening height + 1 inch).
-
Trim all boards to the same length using a circular saw or miter saw to ensure consistency.
Step 4: Add Vertical Trim Boards
-
Reinforce and add style by cutting 1×4 boards for the vertical trim.
-
One board should be placed on each edge, with another in the center if you prefer the classic “Z” or “X” barn door pattern.
-
Not only do these boards strengthen the structure, but they also help hold the main panels together.
Step 5: Optional – Bevel the Edges
-
For a more polished, professional finish, run a router along the edges of each board.
-
Beveled edges give your barn door a cleaner appearance and help reduce splintering.
4. Create the Vertical Trim Pattern
The vertical trim boards are essential for giving your DIY sliding barn door structure, durability, and visual appeal. This trim not only holds the boards together securely but also adds a clean, classic barn-style look. Here’s how to build and attach the vertical trim pattern to your custom barn door.
Step 1: Lay Out the 1×6 Boards Flat
-
Start by laying your cut 1×6 boards side-by-side on a large, flat surface such as a workbench or garage floor.
-
Align them properly to match your measured door width and height.
-
Ensure the edges are flush so the door looks even when assembled.
Step 2: Apply Wood Glue and Clamp
-
Apply strong wood glue between the long edges of each board.
-
Clamp the boards tightly together to create a solid panel.
-
Let the glue dry for the recommended time (usually a few hours) before proceeding.
Tip: Use phrases like best wood glue for barn doors or how to glue barn door panels to help other DIYers find your tutorial.
Step 3: Add Vertical Trim Boards
-
Once the panel is dry, take 1×4 boards and place them vertically on each end of the door.
-
Add an additional vertical board in the center if desired—for both stability and farmhouse-style aesthetics.
-
These vertical trim boards help reinforce the entire structure and make it easier to attach horizontal or diagonal decorative boards later.
Step 4: Secure Trim with Nails or Screws
-
Use wood screws or finishing nails to fasten the trim boards onto the door panel.
-
Place nails or screws every 8–10 inches along the trim to ensure a strong hold.
-
Be sure to drive them in straight and flush for a clean, professional finish.
5. Add Diagonal Trim Patterns
Adding diagonal trim to your sliding barn door gives it more farmhouse charm. It also helps make the door sturdier. The Z-pattern or X-pattern design is a classic visual detail found in many modern and vintage-style barn doors. Here’s how to add these decorative trims using basic tools and precise cuts.
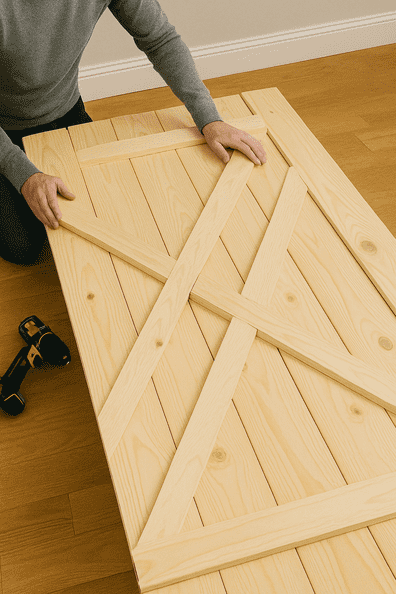
Step 1: Position the First Diagonal Board
-
Begin by laying a 1×4 trim board diagonally from the top corner of one vertical trim to the bottom corner of the opposite side of the barn door.
-
This is the foundation of the Z-pattern barn door trim and gives it the signature “Z” look.
Step 2: Mark the Intersections
-
Once the board is positioned, carefully mark where it intersects with the vertical trim pieces on both sides.
-
These markings will guide your angled cuts, ensuring a perfect, flush fit when attaching the board.
Step 3: Cut at the Proper Angle
-
Using a miter saw, cut the diagonal trim at the angles you marked earlier.
-
Precision is key here—well-angled cuts ensure the trim sits flat against the door for a clean, professional look.
Step 4: Repeat for X-Pattern (Optional)
-
If you want a bold and balanced design, repeat the same process for the second diagonal trim board, this time going in the opposite direction.
-
This creates an “X” pattern barn door design, which is especially popular in farmhouse and rustic décor.
Step 5: Glue and Secure in Place
-
Apply strong wood glue along the backside of the angled trim boards.
-
Position them on the door, aligning them with the original markings.
-
Secure each board using finishing nails or wood screws, spacing them evenly for a secure hold.
For a unique interior accent, consider incorporating board and batten techniques on adjacent walls to complement your barn door.
6. Apply Stain or Paint
Now that your custom sliding barn door is fully assembled, it’s time to bring it to life with the right finish. Whether you prefer a rich, rustic stain or a bold painted look, this step adds the final touch that enhances the beauty and durability of your door. Follow these clear instructions to achieve a professional-quality finish using easy techniques and beginner-friendly products.

Staining Your Barn Door (Best Wood Stain for DIY Sliding Barn Doors)
If you want to highlight the natural wood grain and give your door a timeless, rustic charm, staining is the way to go.
-
Choose a wood stain color that complements your home’s décor. Popular options include light golden oak, dark walnut, weathered gray, or espresso brown for that farmhouse-style barn door.
-
Apply the stain evenly using a brush, foam pad, or clean rag. Make sure to work in the direction of the wood grain to avoid blotchy areas.
-
Wipe off the excess stain with a clean cloth after a few minutes. This step controls the depth of color and gives a smooth finish.
-
Let the stain dry thoroughly—typically between 6 to 8 hours—before moving on to sealing or using the door.
Painting Your Barn Door (How to Paint a Barn Door Step-by-Step)
Prefer a solid color or a vintage chalky look? Painting your barn door adds personality and boldness.
-
Select the right type of paint: Use latex paint for a durable, cleanable finish or chalk paint for a matte, distressed effect.
-
Use a roller or high-quality brush to apply the first coat evenly. Pay extra attention to corners and edges to ensure complete coverage.
-
Apply 2–3 coats for a long-lasting and smooth finish, letting each coat dry according to the manufacturer’s recommendations.
Optional: Add Character and Durability
If you’re going for a distressed barn door finish or want to protect your paint or stain, consider these optional steps:
-
Distress the surface: Use a sanding block, sandpaper, or wire brush to scuff edges and corners. This gives your door a vintage or weathered barn feel.
-
Seal the finish: Apply a clear polyurethane coat for added protection from scratches, moisture, and everyday wear and tear. It keeps both paint and stain finishes looking fresh for years.
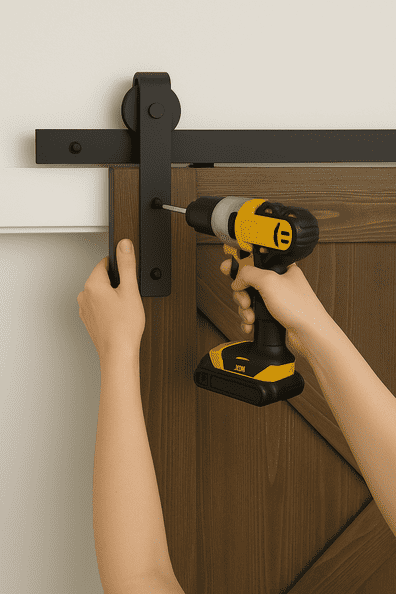
7. Install Hardware and Hang the Door
Once your barn door is finished and completely dry, it’s time to install the sliding hardware and hang your door securely. This final step is crucial for both function and appearance. Follow these easy instructions to make sure your DIY barn door installation is smooth, safe, and looks professional.

Choose the Right Barn Door Hardware Kit
-
Select a barn door hardware kit that matches your door size and interior style.
-
Most kits include a track, rollers, mounting brackets, stops, and a floor guide.
-
Make sure the hardware supports your door’s weight and is designed for indoor use.
Mark and Mount the Track
-
Measure the height of your barn door and add at least 1 inch above the door to determine track placement.
-
Use a level to mark a straight line across the wall where the track will be mounted.
-
Drill pilot holes and secure the track into wall studs using the bolts provided in your kit.
Attach Rollers to the Door
-
Lay the door flat and attach the rollers to the top of the barn door according to the kit instructions.
-
Use a measuring tape to ensure both rollers are installed at the same height and distance from the edges.
Hang the Barn Door on the Track
-
Lift the barn door carefully and hook the rollers onto the mounted track.
-
Test the movement—your door should glide smoothly without resistance or wobble.
Install Door Stops and Floor Guide
-
Mount door stoppers at each end of the track to prevent the door from sliding off.
-
Install a floor guide at the bottom to keep the door aligned and prevent swinging or shifting.
8. Attach the Rollers and Hardware
This part brings your door to life.
Attaching Rollers:
- Most barn door kits come with roller brackets.
- Measure and drill holes at the top of the door.
- Secure rollers with provided bolts.
Add Handle:
- Measure placement (usually center-height of the door).
- Screw or bolt your handle on.
Install Floor Guide:
- Prevents the door from swaying.
- Usually a U-shaped piece that slides under the door.
9. Install the Track and Hang the Door
The final step brings everything together.

Track Installation:
- Hold the track up to the support moulding
- Use a level to ensure it’s perfectly straight
- Mark hole locations and pre-drill
- Install the track with lag bolts
Hanging the Door:
- Carefully lift the door and place the rollers onto the track
- Ensure it glides smoothly
- Install the floor guide to keep the door from swinging
FAQs
1. How much does it cost to build a barn door?
A. You can build a standard-sized barn door for under $300 using basic materials and affordable hardware kits.
2. What wood is best for a barn door?
A. Pine is cost-effective and easy to work with, while oak and cedar offer durability and a premium finish.
3. Do I need a header board for a barn door?
A. Yes, especially for drywall. A header distributes the door’s weight evenly and prevents track damage.
4. Can I use barn doors for bathrooms?
A. Yes, but choose soft-close and privacy lock features for added convenience.
5. What is the standard barn door size?
A. Most are 36″ x 84″, but custom builds depend on your door opening measurements.
6. Are barn doors soundproof?
A. Not entirely. They offer moderate privacy but don’t seal tightly like regular doors.
7. How to maintain a barn door?
A. Wipe it down monthly, check track alignment regularly, and lubricate the rollers.
8. Can I add glass to my barn door?
A. Yes, you can add frosted or clear glass inserts, but you’ll need extra tools and reinforcement.
9. How much clearance do I need above the door?
A. Typically, 6″–8″ of space is needed above the door for the track and rollers.
10. Do barn doors add value to homes?
A. Absolutely. They are trendy, practical, and often enhance interior design appeal.

There is definitely a lot to find out about this subject. I like all the points you made.